Showing posts with label beef. Show all posts

Tuesday, April 10, 2012

Freezer Meals Day 12- Pigs in a Blanket

It's kid friendly week here at Mommy's Kitchen Creations!  Today I've got a super easy one for you.  My kids like to call these mummys, because their grandma made them these for Halloween.  They are nice to just pop in the microwave and heat them up.

Pigs in a Blanket

1 pkg Crescent rolls
2 small pkgs Lil' Smokies

Preheat oven according to package directions (for the crescent rolls). Un-roll crescent rolls and combine 2 triangles together to create a square.  Pinch seams together.  Cut 5 rows lengthwise and then one cut in half cross wise, to make 10 pieces.  Wrap each piece around a link and place on a cookie sheet.   Bake according to crescent roll package directions. 

To Freeze- when cooked, allow them to cool and place cookie sheet in the freezer. When frozen, transfer to a freezer bag. Label and freeze. 

To Thaw: Toss in the microwave and heat through.  You can also bake them according to package instructions, and just add about 5-10 minutes for thawing time.

Friday, March 30, 2012

Freezer Meals Day 5- Cheeseburger Soup

It's called Cheeseburger Soup but it has a little twist to it.  I wasn't totally blown over with this one, but the kids really liked it.  I'm going to make it a little differently next time, just to make it easier.  I like the toss it it, boil it down and scarf soups.  So I am going to try to simplify it just a bit.  I'll have my notes at the bottom.

My Mother-in-law made this one using gluten free flour and said that it worked great.  So those of you gluten free-ers out there, give this one a try!

Cheeseburger Soup

1/2 lb. ground beef        
4 cups potatoes, diced                                  
1/4 cup flour
3/4 cup onion, chopped
3/4 cup carrots, shredded    (I sliced baby carrots)                         
16 oz Sliced American cheese                                                                
3/4 cup celery, diced                                      
1 1/2 cups of milk
1 tsp dried basil                                               
1 tsp. dried parsley flakes                              
4 TBSP butter, Divided   
1 box chicken broth  
Salt and Pepper to taste                            
sour cream (as a garnish)

In a 3 quart saucepan, brown beef; drain & set aside.  In the same saucepan saute' onion, carrots, celery, basil and parsley in 1 TBSP butter until veggies are tender, about 8 minutes.  Add broth, potatoes & beef; bring to a boil.  Reduce heat; cover and simmer for 10-12 minutes or until potatoes are tender.  Meanwhile, in a small skillet, melt remaining butter.  Add flour; cook and stir for 3-5 minutes or until bubbly.  Add to soup; bring to a boil.  Cook and stir for 2 minutes.  Reduce heat to low.  Add cheese, milk, salt and pepper; cook and stir until cheese melts.  Remove from the heat; blend in sour cream.  8 LARGE servings.

Cool soup, Pour into gallon or quart sized freezer bags. Label and date. Lay them flat on a cookie sheet to freeze flat, so that it's easier to stack in your freezer.    To Thaw, fun under hot water, and heat over the stove or in the microwave.  You can also toss it in the crock pot on low (from frozen) and let it sit for about 8 hours.

MY NOTES:  Next time I would just steam the vegetables (and the one tbsp of butter) and about a half cup of water in a smaller pot or skillet.  Make your "roux"  the flour and butter in your larger pot.  Melt butter and add flour.  Whisk to a paste, and cook for 1 minute. Then add milk. Stir and cook until thickened. Then add the rest of the ingredients. cook for another 8-10 minutes to get the veggies nice and tender and marry the flavors.  also, season your meat with salt and pepper when you are browning it.  It will give it a better flavor.

ONE MORE THING:  Always Always Always label your freezer meals.  So many times I've said "I'll remember what that is" when tossing leftovers in the freezer.... yep, did you know that they don't looked the same after about a week in the freezer? 

Thursday, March 29, 2012

Freezer Meals Day 4- Southwest Stuffed Zucchini

I love yesterday's Burritos so much that I decided to try the filling in a zucchini boat. The family reviews we not very favorable.  My kids just aren't huge zucchini fans, unless it's fried.  My husband, didn't like mixing southwest with Italian.  I didn't like it with the ground turkey very much.  I'm still trying to acquire the taste of the ground turkey... but I really like the concept and I think I would really like it with ground beef. 

I had a few friends be the taste testers for it, to see what they thought of it.  So, if you tasted this one, feel free to leave your honest feedback in a comment.  If it's a total thumbs down recipe, I'll put a warning sign up at the top for ya how's that? I would eat it again though. 

Southwest Stuffed Zucchini

1 Jar White Corn and Black Bean Salsa
1 lb Ground Beef (or Turkey)
Shredded Cheese (optional) I used cheddar, but any kind will work
4-5 Large Zucchini

Slice off ends of Zucchini and then slice in half.  Remove the pulp, leaving 1/4 space from the edge and bottom. In a pot of boiling water, add zucchini and boil 3-4 minutes Remove and add filling

Filling:  Brown meat and then add salsa.  Add to the boiled zucchini.  Top with desired amount of cheese. Place them side by side on a cookie sheet or on a plate (whatever will fit in your freezer) and freeze them for about 3 hours, or until frozen.  Combine them into a freezer bag. Label and return them to the freezer.

To thaw: You can microwave on high for a few minutes, or you can bake them at 350 for about 10-15 minutes or until cooked through.

Wednesday, March 28, 2012

Freezer Meals Day 3- Jake's Burritos

Can I just say that these have got to be the best burritos that I have ever tasted! No lie, and I am the burrito Queen. Hey, I can whatever makes me sleep at night right? And they are super easy too.  When I first heard there was ground beef in them, I was thinking, I'll pass! I tried them anyway and even writing about them is making my mouth water.

Our buddy Jake made these for us.  He told me about this unknown treasure.  Actually, apparently a lot of people know about this one but I somehow missed the meeting on it.  It's a Wal Mart brand, white corn and black bean salsa.  Can we say heaven?  It's sooo good!

Jake's Burritos

1 Jar (Wal Mart Brand) White Corn and Black Bean Salsa
1 can Black Beans
1 Lb Ground Beef or Turkey
Shredded Cheddar Cheese (if desired)
Tortillas

Brown the beef in a skillet and then add beans and salsa.  Heat through.  Fill tortillas with meat mixture. Roll into burritos and place in a baking dish.  Top with cheddar cheese (if desired) Bake at 350 for 25-30 minutes, or until cheese is melted.  Serve warm

To Freeze, place burritos into a foil baking dish and top with cheese.  Cover with foil and plastic wrap (if planning on freezing for longer than a month or so) and label. Freeze for about  3 months.

To thaw:  Remove plastic wrap but keep foil on.  Bake at 350 for 30-45 minutes or until thawed.  Then remove foil and bake for another 25-30 minutes. (you can also thaw on the counter and cook as directed above)

Tuesday, March 27, 2012

Freezer Meals Day 2- Minute Burgers

I have to give the credit to this idea to my Mother-in-law.  Genius! We love hamburgers but hardly ever eat them because I have to remember to thaw the hamburger meat, make it into patties, grill it, etc.  Or remember to buy the patties at the store.  It also seams that by the time I remember to get it all ready in time, the buns have gone stale.  I'm exhausted just thinking about all of the coordinating.  And don't get me started on toppings.  Lets just say I eat my burger for the toppings.  I have to have Lettuce, tomato, onions, pickle etc. or id rather eat cereal for dinner.  Lame and spoiled I know, but hey that's me! For some reason, 9 times out of 10 I chose my meal around the condiments I'm craving instead of the dish.

These burgers are perfect to pull out and toss in the microwave.  They are done in about a minute and my kids love em!  A double plus for me.

Minute Burgers

1 Tbsp Onion Powder
1 tsp Salt
1/2 tsp Pepper
3 lbs Ground Beef or Turkey (uncooked)
Sliced Cheese (if desired)

Combine ingredients into a large bowl.  Mix well.  Pour mixture onto a cookie sheet and press firmly spreading the mixture across the entire cookie sheet. Bake at 350 degrees for 18 minutes. Remove from oven and allow to cool slightly. Cut into squares.  (the size of the buns you will be using) Place (cooled) cookie sheet with meat in the freezer for about 3 hours or until frozen.  Also freeze the buns separately.  When both the buns and the patties are frozen, combine them together and add a slice of cheese to each burger if desired. Wrap hamburgers individually in wax paper. Then put them in freezer bags. I did 4 into a gallon sized bag. Label and date the bags.

To re-heat, microwave in the wax paper for 1 to 2 minutes.  Don't over cook or the bread will get hard. Top with your favorite condiments and serve. I would suggest cooking the meat for about a minute first, then add the cheese and bread, wrap it in the wax paper and do another 30 seconds.

Monday, March 26, 2012

Freezer Meals-Day 1 Fajita Tacos

It's Freezer Meal time here at Mommy's Kitchen Creations!  And Boy oh Boy am I excited!  We are going to have 30 days of Freezer meals for ya.  I've decided to really challenge myself with my blog this month.  It's easy to let the day get away from me sometime and forget to post a recipe.  In an effort to get more organized in my life, I thought this would be a great may to stretch myself.  Each week will feature a main ingredient or theme. This will help you buy in bulk and save some time.  This week will be centered around BEEF! It's what's for dinner!  If you aren't a red meat fan... this is your lucky day, each meal is easily substitutable for either chicken or ground turkey.

For all of you Arizona-ites out there, you know it's only a matter of time before it starts to feel like you start melting!  Don't get caught in the middle of summer with nothing to cook for dinner. Cooking over the hot stove all day is no fun when it's 115 degrees outside.  Plan your meals now before the heat hits.

If you are totally apposed to turning on your oven in the summer, and are about to tell me to get lost, keep reading.  Some of these meals, you can re-heat in the crock pot, or microwave.  For the ones that require the oven... just stick them on the back porch for about 10 seconds in the middle of august.  Not only will they be thawed but will be cooked clean through! Ok seriously though, here is what you need to do. 

Get yourself a roaster oven. You know, one of those big ol' crock pot looking things that you see everywhere at church functions.  They are basically a portable oven.  The one that I got was $60 and it uses 70% LESS energy than your oven.  Get the big ol' sucker though, don't go for the little ones, otherwise your pans won't fit.  I got a 22 quart and it fits my 11x9 pan in it.  I've also used it to mass produce tons of meals.  It's seriously one of the best investments I've made! LOVE IT!!! If you are worried about it taking up too much space, it can also double as a bath tub for your kids on the weekends. Hehehe

Fajita Tacos

1 lb fajita meat sliced (or slice your own steak into thin strips)
3 Bell Peppers sliced (I like 1 of each- red, green and orange)
1 Large Onion sliced
1 Tbsp Corn Starch
1 1/2 tsp Chili Powder
1 1/4 tsp Salt
1 tsp Paprika
1 tsp Sugar
3/4 tsp Chicken Bullion
1/4 tsp Cumin
1/2 tsp Onion Powder
1/4 tsp Cayenne Pepper
1/4 tsp Garlic Powder
Tortillas

Cook meat until no longer pink.  Toss in all other ingredients and cook for a few minutes, until vegetables are fork tender but not soggy. 

Add desired amount to a tortilla and fold in half. In a skillet or griddle add 1 tbsp butter or oil.  Grill fajita on both sides until crisp.  Slice into desired size pieces or leave as it.  Freeze on a cookie sheet ( to keep them from sticking together)  Then transfer to freezer bags.  Label and date.

To reheat... Microwave until cooked through (about 2-3 minutes) or re-grill on medium low heat until heated through and crisp.  You can also heat in the oven. (I haven't done this yet, but would say 375 for about 10 minutes.)

Wednesday, January 18, 2012

Hearty Beef Stew

This is my mom's recipe.  It is so good!  We will often can a bunch of jars at a time,  It makes to the fastest meal in the west.  And one of the best I might add.  I've also split this recipe into two freezer bags and just frozen them.  It makes for a fabulous crock pot freezer meal.  This recipe, makes quite a bit of stew.

Hearty Beef Stew

1 (5 lb) roast, cubed
6 large carrots sliced
4 large baking potatoes
1 large can Cream of Mushroom Soup
1 (46 oz) can V-8
1 tsp Parsley
salt and pepper to taste

 For all methods of cooking:  Stir soup, V-8 and seasonings into a large pitcher. 

Crock pot: toss meat and vegetabless into a large crock pot. Pour over the liquid mixture.  Cook on low for 8 hours. (or on high for 4 hours)

For a crock pot freezer meal- toss all ingredients (raw) into two (gallon) freezer bags. Pour liquid mixture into both bags evenly.  Freeze. When ready to eat, toss in the crock pot and cook for 9-10 hours on low and 5-6 hours on high.  

For canning:  Put desired amount of vegetables and meat into each jar.  Pour liquid mixture into the jars leaving a half inch of head space.  Process in a pressure canner for 75 min (pints) or 90 min (quarts)  Remove and allow them to cool on a towel on the counter. 

Monday, January 16, 2012

Cheese Crisp Tacos

The quote "Cheddar makes everything better" comes to mind on this one.  Cheese crisps, mean two different things to me and my husband, at least they used to.  My cheese crisps are a crunchy tortilla with cheese melted on it.  His is crispy cheese.  Go figure.

I'm now a sucker for a nice cheese crisp, Trever style! The secret to making these delectable snacks of scrumptiousness, is Dixie. No no, not the good ol land of Dixie, but the paper plates.  There is something about the Dixie plates that allows the cheese to melt without sticking to the plate. I'm sure its the waxie surface. 

My husband was experimenting with these one day, and in the words of Emerill... "BAM" this crunchy, cheesy sensation was born.


Cheese Crisp Tacos

1 lb ground beef (or turkey)
1/2 medium onion (diced)
2 cloves garlic
cheddar cheese
toppings of your choice

Brown meat and onion together until no longer pink.  Add garlic. Stir well and cook one minute.  Remove from heat.  Using a Dixie plate (whichever size you like) cover the bottom of the plate with a layer of cheese.  Microwave on high for about1-1 1/2 minutes. Checking on it every 30 seconds. It's done when the cheese is still soft but no longer gooey.

Dab a paper towel onto the cheese to remove excess grease.  Remove cheese (quickly) and fill with desired meat and toppings. Fold over. The cheese will harden as it cools. 

Thursday, January 12, 2012

Slow Cooker Pepper Steak

I know that all of you are just aching to see another one of the fabulous dishes that my Mother in law made for me while in recovery.  Yeah, I get pretty spoiled when she cooks! The thing I like about this one, is that it is a crock pot recipe.  I have to thanks my sweet Stephanie for taking the picture for me. 

We served this over Coconut Rice.  Though I liked this dish better fresh, it freezes quite nicely. So double your batch and just freeze the leftovers. Thaw, then warm it in the microwave. Yummo!

Slow Cooker Pepper Steak

2 pounds beef sirloin, cut into 2 inch strips
garlic powder to taste
3 tablespoons vegetable oil
1 cube beef bouillon
1/4 cup hot water
1 tablespoon cornstarch
1/2 cup chopped onion
2 large green bell peppers, roughly chopped
1 (14.5 ounce) can stewed tomatoes, with liquid
3 tablespoons soy sauce
1 teaspoon white sugar
1 teaspoon salt

Sprinkle strips of sirloin with garlic powder to taste. In a large skillet over medium heat, heat the vegetable oil and brown the seasoned beef strips. Transfer to a slow cooker.

Mix bouillon cube with hot water until dissolved, then mix in cornstarch until dissolved. Pour into the slow cooker with meat. Stir in onion, green peppers, stewed tomatoes, soy sauce, sugar, and salt.

Cover, and cook on High for 3 to 4 hours, or on Low for 6 to 8 hours.

This recipe taken from All recipes


Wednesday, October 12, 2011

Stuffed Bell Peppers

You know how food, sometimes brings back memories of the first time you ate it, or a special moment in your life when you ate it?  This one is both for me. 

I had the opportunity to go to Mozambique Africa years ago with a group called Care For Life. It was the most amazing and special trip of my life.  Things happened to me there that changed my life forever.  Because of that trip, I later found and married the man of my dreams!

Wow, lots of emotion there... back to food.  So when we first got there, we were staying with an amazing couple. He was a counselor in the mission presidency.  She, was an awesome cook.  She made us stuffed bell peppers one night. I didn't even like bell peppers then. I was sold. The flavor combo just melted in your mouth.  It was so delicious.  I think I've had them once since that day.  Almost one of those things that you don't dare eat, for fear of contaminating the experience or something. 

Anyway, I came across this recipe from my dear friends blog and thought I would give it a try.  I'm so glad I did! Try it, you'll love it! 


Stuffed Bell Peppers

6 green bell peppers (next time I'm going to try a variety of colors)
2 tsp salt (divided)
1 pound ground turkey (I used ground beef
1/3 cup dehydrated onions (or 1/2 cup chopped onion)
1 (14.5 ounce) can diced tomatoes
1 large garlic clove, minced
1 tsp soy sauce
1/2 tsp cayenne pepper
1/2 cup uncooked rice
1/2 cup water
2 (10.75 ounce) cans condensed tomato soup
1/2 cup water
1 cup shredded Cheddar cheese

Directions

1. Bring a large pot of water and 1 tsp salt to a boil. Cut the tops off the peppers, and remove the seeds. Cook peppers in boiling water for 5 minutes; drain. Sprinkle the remaining 1 tsp salt inside each pepper, and set aside.

2. In a large skillet, saute turkey(or beef) and onions for 5 minutes, or until meat is browned. Drain off excess fat, and stir in the tomatoes, garlic, rice, 1/2 cup water, soy sauce, and cayenne pepper. Cover, and simmer for 15 minutes, or until rice is tender. Remove from heat.

3. Preheat the oven to 350 degrees. Fill each pepper with the turkey and rice mixture, and place peppers open side up in a baking dish. In a medium bowl, combine tomato soup with water to make the soup a gravy consistency. Pour inside the peppers. Sprinkle with cheese.

 4. Bake covered for 25 to 35 minutes, until heated through and cheese is melted and bubbly.

Recipe taken from Pickle Boat Recipes

Wednesday, October 5, 2011

Mini Corn Dogs

I'm actually a big fan of corn dogs believe or not.  Especially if they are fried.  I found this recipe for mini corn dogs and really enjoyed it. You can also use the same recipe to make regular sized ones.  This is a fun meal to make.  you want to get a good quality hot dog.  It makes it taste that much better. I really like the Hebrew National brand.  But find which one you like and go for it!

Mini Corn Dogs


oil for frying (I use canola)
12 beef franks (I used Ball Park franks I got from Costco)
1/4 cup cornstarch
1 cup yellow (or white) cornmeal
1 cup all-purpose flour
1/4 teaspoon salt
1/8 tsp pepper
1/4 cup sugar
4 tsp baking powder
1 egg
1 cup buttermilk plus 2 tbsp

Preheat some oil in a deep fryer or large skillet to 365 degrees. You need it to be a couple of inches deep and the pan needs to be large enough to fit the corn dogs in. You want to completely submege the corn dogs in the oil.
Cut each of the hot dogs into thirds and toss in the cornstarch. Shake off any excess.
In a bowl, whisk together the corn meal,flour, salt, sugar, and baking powder. Add egg and buttermilk, then whisk until well combined. If needed, add more buttermilk to make desired consistency. You want it like a thick pancake batter so it will stay on the hot dogs.
Now if you want, you can insert toothpick into each piece of hot dog, dip in batter until well coated, and fry. I dipped the hot dogs in the batter and just removed each one from the batter using 2 toothpicks and gently dropped them into the oil. I recommend only doing 6 at a time. This amount was manageable. Fry until golden brown. Drain on towels.
If you want to keep them warm while you fry the others. Place them on an oven safe cooling rack placed on a cookie sheet and place in a 200 degree oven. This will keep them warm and crisp. Makes 36 mini corn dogs.

recipe taken from Sweet Pea’s Kitchen

Wednesday, August 24, 2011

Green Chile Burritos

I've enjoyed taking a couple of days off the past few days.  I've been recovering from last weeks class! Wow what a success!!!  I've also been focusing on potty training my little one.

I've been working on my iron levels to get them back up to par again, so I don't get so wiped out.  I have been so blessed to be able to do so much more than ever this pregnancy.  I've really been enjoying all of the fun things I've been able to do.  My kids have never been happier, and I have never been happier. 

Our freezer meal class this past week was a burrito extravaganza.  We had a great turn out!  We made Green Chile Burritos, Chile lime Chicken Burritos, Breakfast Burritos and Bean and Cheese Burritos.  Each person walked away with at least 32 burritos to store for a rainy day.  Boy oh boy was it fun!  The downer to my little story is that I forgot to take pictures of the different burritos!!!  So if anyone has any pictures, please feel free to send them my way.  This one is one I took a while ago before I perfected my recipe. But you get the general idea.

All 4 of these burritos freeze really well and will last up to 3 months or more in the freezer.

Green Chile Burritos

1 Large pork shoulder roast
1 large Can of Green Enchilada Sauce (I use Las Palmas)
1 bottle of Salsa Verde (make sure the main ingredient is tomatillos)
1 large can (or 2 small) diced tomatoes (with green Chiles is preferred)drained
4 cans diced green chiles (drained)

Cook the meat in the crock pot on low for about 8 hours (4 on high) or until the meet is shredable. Drain juices from the meat and then shred the meat. Add all other ingredients. Scoop into burrito size tortillas, roll and serve. To freeze, roll each burrito in plastic wrap or foil.  Makes about 2 dozen burritos.  

To re-heat, cook on high (make sure to remove foil FIRST) in the microwave for about 4 minutes from frozen, until cooked through. 

Tip: You can use any type of cut for this.  The butcher told me shoulder is best for shredding, but all work. You can also use beef too. (pictured above) 

Monday, August 15, 2011

Mashed Potato Beef Bake

This dish was kind of an iffy one for me.  I thought that the cream of Mushroom was pretty overpowering.  Some people liked it that way.  I thought the Garlic was too overpowering too. It could be that I just added too much.  I couldn't find the roasted garlic version of the soup so I just added a clove of garlic, and used the plain soup. 

What I ended up doing with the last batch I made, was just left the garlic out, and didn't add any cream of mushroom to the potatoes. I think that way was the best.  So I will post my version and the link to Campbell's version. You can choose.  It all depends on whether or not you like mushroom soup.  Not my favorite by far, but I'll eat it.


Garlic Mashed Potatoes and Beef Bake

1 pound ground beef
1/2 (10 3/4 ounces) can (about a half cup) Condensed Cream of Mushroom Soup
1 bag (16 ounces) frozen vegetable combination (broccoli, cauliflower, carrots), thawed
2 cups water
3 tablespoons butter
3/4 cup milk
2 cups instant mashed potato flakes 

Heat the oven to 400°F.  Cook the beef in a 10-inch skillet over medium-high heat until well browned, stirring often to separate meat. Pour off any fat.

Stir the beef, soup, Worcestershire and vegetables in a 2-quart shallow baking dish.

Heat the water, butter in a 3-quart saucepan over medium heat to a boil. Remove the saucepan from the heat. Stir in the milk. Stir in the potatoes. Spoon the potatoes over the beef mixture.

Bake for 20 minutes or until the potato mixture is lightly browned.

Tip: I used butter flavored potato pearls and left out the butter above. Just add a little more milk or hot water to desired consistency.

To Freeze:  Make in an aluminum pan. Before baking, wrap with foil, and plastic wrap.  Freeze up to 3 months.

Recipe adapted from Campbell's Kitchen

Monday, June 27, 2011

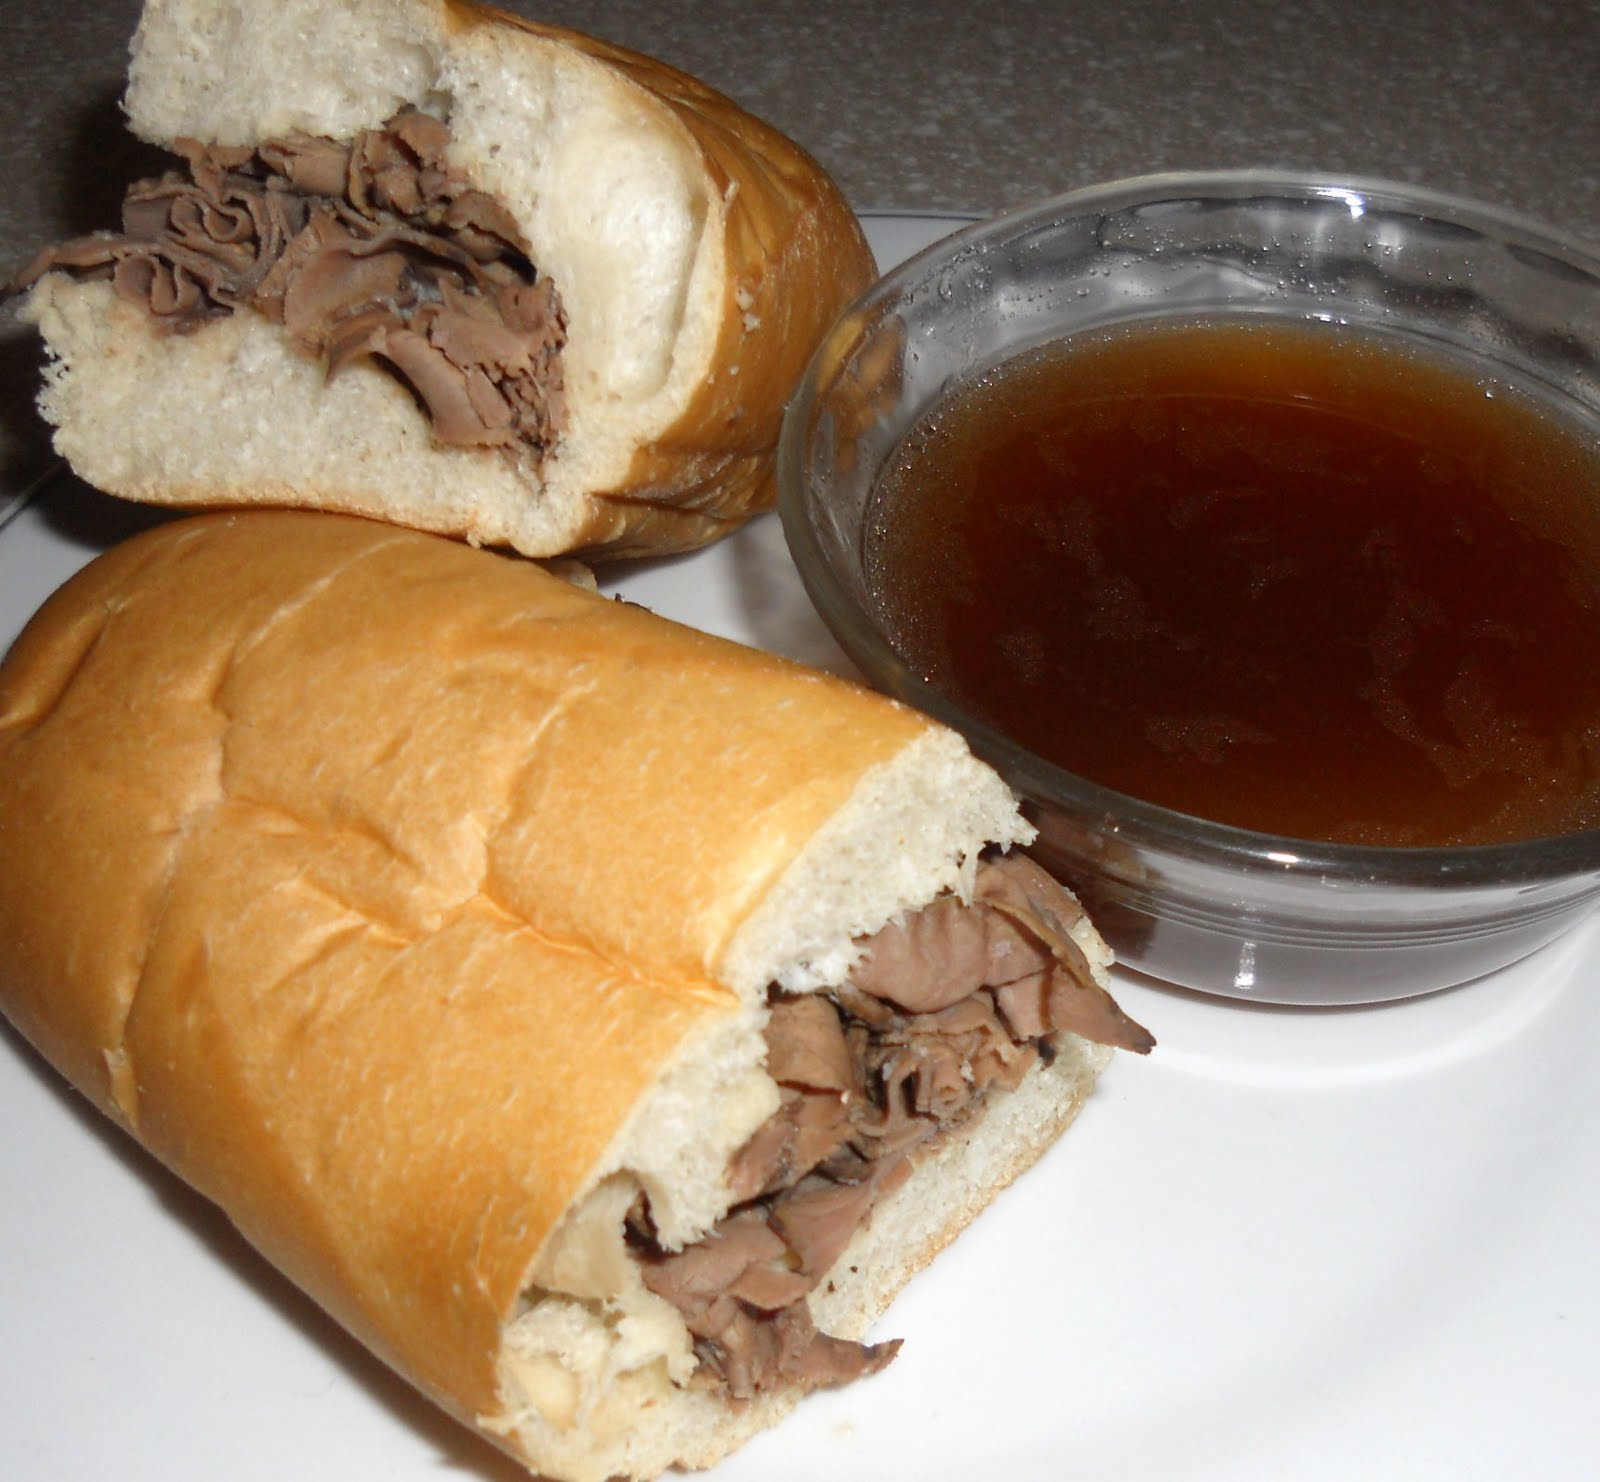
Easy French Dip (Ah Jus Sauce)

I've been on the lookout for a while for a simple Ah Jus Sauce to make out own french dip sandwiches with.  You can always buy the flavor packets and pour those in, but I like to make my own things from scratch as much as possible. That way, I can make it whenever I want with the ingredients I have on hand. This one is a simple and quick version for those crazy nights where you want to just throw something together or those days that you want to just throw it in the crock pot and forget about it. . 

I put it in the crock pot on low most of the day, just to let the juices simmer and soak into the meat etc.  But you could really just throw it on the stove and warm it up for a few minutes. 

Easy French Dip (Ah Jus Sauce)

1 box beef broth
1 lb roast beef sliced/shaved thin
1/2 tsp garlic powder
1/2 tsp onion powder
Hoagie/Sub Rolls

Put first 4 ingredients into a crock pot on low for 4-8 hours. With a fork, place roast beef onto a sub roll.  Put reserved juice into individual bowls.  Dip sandwich into the juice. Enjoy

Friday, May 27, 2011

Easy Chipotle Meatballs

This is one of the easiest dishes ever to make! It only requires 2 items. It's makes a great meal, served over rice or just as an appetizer.  The flavor of the Chipotle sauce are simply delish.  It's a little zippy but even my 15 month old practically inhaled it. I like this Roasted Raspberry Chipotle sauce.  You can find it at at Costco or Sam's Club. 

We loved these served over Coconut Rice. The Coconut and Raspberry make a great combo!  I like to get the Meatballs pre made from Costco. You can make your own basic meatballs or find any premade Italian style or regular flavor.  I don't really use an exact recipe for this meal.  I just coat the meatballs with the sauce, but this is about how much I like to use. 

Easy Chipotle Meatballs

25-30 frozen Meatballs
1 1/2 Cups of Chipotle Sauce

Place both ingredients into a crock pot.  Cook on low for up to 8 hours.

Monday, May 23, 2011

Kabobs on the Grill

We experimented with a few flavors while grilling this week.  We had a night of Kabobs and made them a few different ways.  My favorite was the chili lime kabobs.  My husband didn't measure as he went, so this recipe is just an estimate.  Have fun with it and see what you can come up with.  I also really like the teriyaki ones.   The olive oil ones weren't my favorite, but I think I just under salted it. It needs more salt than you think for all of those veggies and meats.

We also found that by putting them on the bottom rack, even on low heat, the veggies were done and burning before the meat was done. So, we put them on the top rack this time and had much better success.  We hooked the skewers into the back of the top rack and laid them side by side, so that we could fit more of them on there. It worked out perfectly!

Kabobs on the Grill


Use any type of meat you desire- shrimp, chicken, or beef etc.
Vegetables- peppers, onions, zucchini, yellow squash, etc
Fruits- pineapple, tomatoes etc

For all kabobs: Cube meat, vegetables and fruit. Coat them with desired seasonings.(see below)  Skewer them one by one, in desired order.  Grill on top rack at medium low heat until cooked through.  (cooking times will vary depending on size and types of meat and vegetables.)

Tip:  If using wooden skewers, soak them in cold water for 30 min. so they don't burn.  

Chili Lime Kabobs

1 Tbsp lime juice
1/8 cup water
About a tsp of Salt
1/2 Anaheim pepper chopped fine

Toss meat and veggies with sauce (makes about 3 kabobs)

Teriyaki Kabobs

Terryaki Baste and glaze

Coat meat and veggies with desired amount of Teriyaki Baste and Glaze (I like Kikkomans).

Olive Oil Kabobs

Olive oil
salt  
pepper

Coat meat and vegetables with olive oil, salt and pepper.  (don't skimp on the salt)


Monday, May 2, 2011

Flatbread Tacos

Here is a delicious, quick, and easy meal! It's also one that your kiddos will love.  This recipe is made with refrigerator biscuits. Such as Pillsbury. You don't need any extra oil or anything.  The oil in the biscuit is plenty to crisp that little puppy right up. This turned out so much better than I had expected. This recipe comes from Laura over at Real Mom Kitchen. I changed it up just a bit to make things even easier. 

I love to find and post recipes that are simple and use minimal ingredients.  For busy moms like me, you don't want to have to run to the store every time you find a new recipe you like, to buy all new ingredients. So you can expect to find simple easy meals on this blog.  Every once in a while I'll throw in a challenge, but for the most part, we are keeping it simple. Also, I have run into many people who would like info on the basics.  So I will try to be detailed in my recipes, to provide information for the seasoned cook as well as those just getting started in the cooking world. 

I want everyone to gain the confidence in the kitchen that I have been able to gain, just in the past few months. I have tried so many new things lately, it has been very edifying.  I have always loved to cook, but never had any major confidence. If you ever have any questions, please post them. I would love to hear them and will answer them asap. My goal for this blog is to help everyone find joy and confidence in cooking and baking.

Flatbread Tacos

Ranch dip
1 cup (8 ounces) sour cream
2 teaspoons ranch salad dressing mix
Mix sour cream and ranch powder in a bowl and set aside. 

Filling
1 pound ground beef
1 can (15 ounces) red kidney beans, rinsed and drained
1 can (14-1/2 ounces) petite diced tomatoes undrained
1/8 cup taco seasoning (this is 1/2 of an envelope)
Brown beef. Stir in remaining ingredients. Simmer on low until warmed through

Flatbread
One can of refrigerator biscuits

Roll out dough on a flat surface.  (rolling on wax paper will help it keep from sticking.) I like to get mine pretty thin. It will puff up while cooking.  Place on a skillet or griddle and cook at medium low heat until both sides are golden brown.  (a couple minutes on each side)
Top with sour cream mixture, then ground beef mixture then top with additional toppings.

Optional toppings: sliced ripe olives, shredded lettuce, diced green onion and shredded cheese

You can fold it up or just eat it like a tostada. I like to just cut it up and eat it in pieces.

Friday, April 1, 2011

Tastes Like Lasagna Soup

This recipe comes from Paula Deen.  As you know by now, I love my soups! This one has got to be the best soup on the planet! I changed it up a little bit from her recipe, to make it even better for us.  Mmm, I love this soup. The best part, is that it tastes just like lasagna. It's amazing!
Tastes Like Lasagna Soup

1 lb ground beef
1   onion, chopped
3   cloves garlic, minced
1 teaspoon thyme
1 tablespoon firmly packed brown sugar
1   (32 ounce) box chicken broth
2   (14.5 ounce) cans petite diced tomatoes
2   (8 ounce) cans tomato sauce
2 teaspoon Italian seasoning
1/2 teaspoon salt
2 cups broken lasagna noodles
2/3 cup grated Parmesan cheese
2 cup shredded mozzarella cheese
In a large stock pot, combine ground beef, onion, and garlic. Cook until browned. Stirring occasionally. Drain well. 

Stir in thyme, brown sugar, broth, diced tomatoes, tomato sauce, Italian seasoning, and salt. Bring to a boil over medium-high heat; reduce heat and simmer 20 minutes. Add noodles, and simmer until noodles are tender. Stir in Parmesan cheese. Top with mozzarella and serve immediately.

Friday, March 18, 2011

Easy Stroganoff

I found a few recipes for Stroganoff that I liked out of our ward cookbook, then created my own recipe from them. This meal takes about 15-30 minutes to prepare. It is so simple! I know it probably sounds weird to have chicken and beef in the same meal, but surprisingly its super good! If you just can't handle the thought, you can substitute a can of cream of mushroom instead of chicken. My husband just hates mushrooms so I use cream of chicken. There are very few things he wont eat and mushrooms is one of them.  Also peppers and onions.  That is why I use the dehydrated ones instead. For some reason, he has convinced himself they are not real onions that way. Ha ha ha.

Easy Stroganoff

1 lb  ground beef (browned)
8 oz sour cream
1 large can Cream of Chicken (or Mushroom)
1 tablespoon dry onion soup mix
Worcestershire sauce to taste ( I really like the flavor so I add about 4 tbsp. Just taste as you go)
1 lb  egg noodles

Cook noodles according to package instructions.

Brown beef in a skillet and add Cream of Chicken soup, onion soup mix and Worcestershire sauce. Cook on medium heat for about 10 minutes. Stirring frequently. Turn down heat and add sour cream. Heat through, pour over egg noodles.

Variation: You can add sliced onion and sliced mushrooms if you want. You can saute them up as you cook the brown beef and then add other ingredients according to instructions.

Variation: You can also serve this over rice instead of egg noodles.

Tuesday, March 15, 2011

Taco Soup

Here's is another favorite of mine that came from my Mother-in-law.  I love her cooking! Can you tell?  There are so many variations of this dish, but I really like her version. I like mine thick. I use my chips as my spoon.  The rest of my family likes it a little more soupy and they crush their chips into it. Either way it's a winner at this house!
Taco Soup


2 cans kidney beans (drained)
2 cans corn (drained)
1 lb hamburger (cooked)
1 can tomato paste
2 cans tomato sauce
2 pkgs taco seasoning
2 cans tomatoes (stewed)
Water to desired consistency

Cook hamburger, combine all ingredients in crock-pot or stock pot.  Heat and serve. Serve with chips, olives, avocado, cheese and sour cream. Can be served thicker as a dip or more as a soup.