Showing posts with label canning. Show all posts

Friday, January 13, 2012

Easy Homemade Applesauce

When I started this blog, my goal was to share easy recipes that a mommy could make on a mommy schedule.  I'm a huge believer of taking one day out of the week/month/or year and stock up on a bunch of the same things.  Who has time to make applesauce from scratch every time your kids want it. 

Another goal of mine, is to make recipes dishes using tools that are usually found in a mommy's kitchen. When I think of making applesauce, I think of using that big machine and a sticky mess everywhere. I don't have one of those, nor do I know anyone that does.  So, here is a simple way to make it in your very own kitchen, and your kids can help! All you need is a pot and a blender.  If you have one of those apple peeler gadgets, those are wicked awesome and will speed up the process by leaps and bounds!


Easy Homemade Applesauce


15-20 Fuji Apples (or other sweet apple)
1 cup sugar
¼ tsp salt
4 tbsp lemon juice
2 tsp cinnamon (optional)
1 cup water

Peel, core and slice apples.  pour into a pot with one cup water.  Over medium heat, steam the apples until soft and tender.  Allow apples to cool so that you don't have This happen. Transfer apples, reserving the liquid, to a blender. Add in sugar, salt, lemon juice and cinnamon if desired. Blend until creamy, adding liquid to the desired consistency.  Eat right away or pour into a quart jar for preserving.

To preserve: pour applesauce into a quart jar. Wipe down rim and put on lids. Boil in a Water Bath for 20 minutes.  The time is the same for pints and quarts.  Remove the jars from the Water Bath and allow them to cool on a towel for up to 24 hours. 


Monday, May 30, 2011

Carrot Chowder

Carrot Stew, Carrot Stew It's our favorite thing to do...   I used to sing that song in elementary school, and every time I make it to this day.  My mom made this soup for us all growing up.  Its so yummy!  if you want to can this, combine all ingredients raw, and using half the water into a large bowl. Then pour into quart jars and process in a water bath for 90 min! Instant meal in the future! Also, I like to make a double batch and freeze half of it.

The picture didn't turn out too well. I'll take another one when I make it again.  I should be getting my new camera this week. Yippee!!!  Lets hope that it takes some beauties for ya'll.

Carrot Chowder


1 lb. Hamburger
½ C. diced celery
½ C. diced green pepper
1 med onion, diced
1 C. Water
½ tsp. salt
4 C. tomato juice
2 small cans cream of celery soup
1 ½ c. water
2 ½ c. shredded carrots
1/8 tsp marjoram
½ tsp garlic powder
½ tsp pepper
¼ tsp. salt
1 tsp sugar

In a large stock pot, combine first 6 ingredients. Saute' until tender. Add remaining ingredients. Simmer for ½ hour.

Wednesday, May 25, 2011

Chile Lime Chicken Tostadas in a Slow Cooker

This recipe is a huge hit in our home.  Every time I make it, the kids just gobble it up.  I found the recipe over at Real Mom Kitchen one day when I was needing some new "go to" recipes to try. I love that you can just throw it in the crock pot in the morning and it's done by dinner.  And it makes my house smell good all day too! There's nothing like a fabulous meal and a little bit of work right?  You can also can this really easy for a quick meal in the future. See below for details on how to can it. I also like to double this recipe and freeze half of the chicken. That way I have some later for a last minute meal. 

You could use this as a taco filling, on quesadillas or even as an enchilada filling like my Sour Cream Enchiladas.  Just use this recipe (below) to flavor the chicken and leave out the extra can of green chiles in the enchiladas recipe.  Super yummy!


Chile Lime Chicken Tostadas

1 can diced green chilies
4 cloves of minced garlic
1 1/2 Tbsp. chili powder
3 Tbsp. lime juice
1 diced medium onion
2 lbs. boneless chicken breasts
1 can refried beans, warmed
10 tostada shells
Desired toppings such as: shredded lettuce, shredded cheese, salsa, sour cream, sliced olives, guacamole

Add chicken and onion to a slow cooker that is at least 3 1/2 quarts. In a bowl combine green chilies, garlic, chili powder, and lime juice.  Pour over chicken. Cover and cook on low for 5 to 6 hours.
Remove chicken from slow cooker and shred.  Mix in 1/2 cup of juice remaining in slow cooker to the shredded chicken. Spread warmed refried beans on tostada shells. Top with hot chicken mixture and any other desired toppings.

Chile Lime Chicken (how to can it)

Cube raw chicken and pour into a large bowl. Add in, green chiles, garlic, chile powder, lime juice and diced onion.  Mix well.  Using a canning funnel if possible, pour chicken into the jars filling them with 1/2 inch of head space. Wipe rim of jar with a damp paper towel. Secure on the lid.  Process in a pressure cooker for 75 minutes for pints and 90 minutes for quarts.  Remember!!!  You can mix pints and quarts in your pressure cooker. You will just have to process it for the full 90 minutes.  Always Always Always use the greater amount of time when mixing sizes of jars, or when in doubt.  It won't hurt the chicken to be in there a little longer.

Tip You can usually get about 1 lb of meat into a pint jar.  So this recipe will only give you 2-3 pints. (I like doing this one in quarts for my size family) If you want a good supply I would make the recipe x5 or 6.


Friday, May 13, 2011

Spaghetti Sauce (Fresh or Canned)

Many people have been asking for some good canning recipes.  This is a spaghetti sauce recipe for fresh herbs.  If you don't have fresh ones, you can substitute for dried ones.   Dried herbs are typically more concentrated and potent, so you wont need as much, if you are substituting.  The ratio is typically 3 times more fresh herbs than dried herbs. I also have a dried herbs recipe called JJ's Spaghetti Sauce.  Either one, you can "can".

There is no spaghetti sauce out there that compares to homemade sauce.  If you are eating it for dinner tonight, canning or freezing some for later or both... the steps are the same up until it's time to pour it into the jars. You will need a HUGE pot.  I used my pressure cooker because I didn't have a pot big enough. 
REMEMBER:  Taste as you go and add spices, salt, etc as needed.  It does need to boil for at least 30 minutes before the flavors really combine so don't add anything extra before that!
Spaghetti Sauce (Fresh or Canned)


25 lbs tomatoes (about 9-10 quarts blended) ( I used Roma's this time)
1  6lb 10 oz can of tomato puree (Costco)
10 large bay leaves
4 medium onions diced
1 ½ tbsp minced garlic
3-4 tbsp olive oil
1 1/4 cup sugar
1-1/2 cups fresh herbs of your choice.  (This is what I used)
½ cup parsley
½ cup basil
4 tbsp oregano
4 sprigs of rosemary
3 tbsp thyme
1 tsp marjoram (ground, not fresh) (optional)
¼ cup salt
2 tbsp pepper
 lots of ice

Prepare Tomatoes:  Cut the stem area out of the tomato. (or just slice the top off to save time)
Slice an "x" about 1/4 inch deep on the bottom of the tomato (this allows the skin to peel really easy when boiled.)

Drop tomatoes a few at a time into boiling water. Boil for 30-60 seconds, until skin softens and starts to peel back.  Remove and immediately place into a bowl of ice water. It melts fast, so keep adding ice as needed.
When cool enough to touch, peel the skins and discard. You can blend the tomatoes to make a smoother sauce or just smash with a potato masher.  Pour tomatoes and herbs into a huge stock pot.

In a skillet, add olive oil, garlic and onions. Saute until tender and then add to the pot.

Boil for about 30 minutes, stirring frequently.  After 30 minutes, taste and add flavors according to desired tastes.  Boil down to desired thickness.

It's ready to serve or if you are canning the sauce, continue

You will need to add 3 tbsp of vinegar per quart jar. Pour sauce into clean jars leaving 1 inch of head space. Wipe rim clean with a damp paper towel. Screw on lids and place into a water bath.  Boil for 40 minutes. Pull out with canning tongs and let cool on a towel on a flat surface.


TIP:  If you are adding vegetables to your sauce, you will need to to pressure cook it at 11 lbs of pressure for 30 min for pints and 35 minutes for quarts.

If you want to put meat in it, you will need to pressure cook it at 11 lbs of pressure for 75 min for pints or 90 for quarts.

What is a water bath? A water bath is basically a huge pot that will cover your jars with about two inches of water.  You can buy a water bath or just use a tall pot. You will need to bring the water to a boil and then start the timer.  The water needs to boil the entire time.

Tuesday, March 22, 2011

Canning Chicken

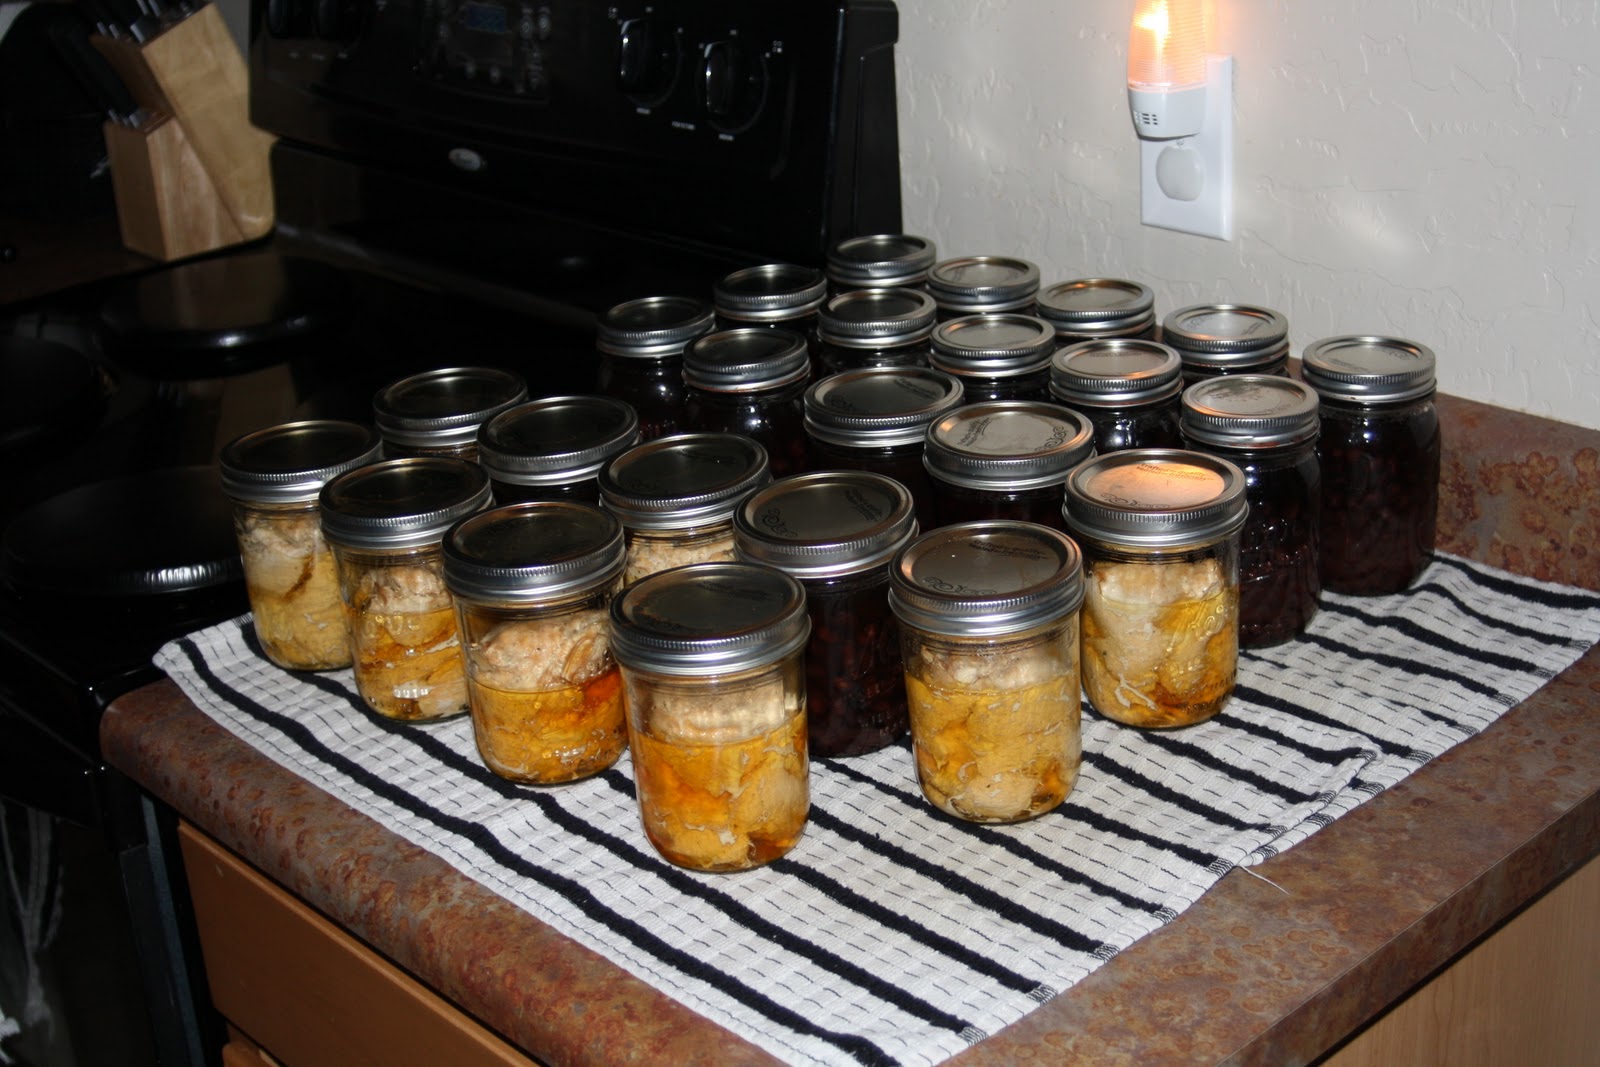
The great thing about meats is that it is probably one of the easiest things to can. My friend and I bottled some chicken the other day and took some pictures. I'll take pictures as I start canning things as well.  Meat is super easy.  You just shove it in to the jar, put on the lid and put it in the pressure cooker.

I don't like to flavor my chicken ahead of time, because I never know what I am going to use it for. Same with my ground beef. There are so many things that you can put your canned chicken into. I use it quite often when I make my Sour Cream Enchiladas or Hawaiian Haystacks or even my Crunchy Oriental Noodle Cabbage Salad. Anything that calls for shredded chicken... you can use it for. Can you imagine, no more buying the expensive stuff in the can at the store. (That always tastes like tuna fish!) Just open up your jar and toss it in. It's so nice and easy!!! Also, from what I understand, meat can only be canned in a pressure cooker. It will not seal and stay sealed properly with a water bath.

If you would rather add some flavor to your chicken, feel free. Any flavor or brine you like will work just fine.

 Step one- There are two types of Jars. There are wide mouth and regular mouth jars.  (I prefer the wide mouth because they stack so much easier on my shelf and in the pressure cooker.) You will also need to decide if you want to use Pint or Quart jars. You can use both also.  See times below...
  
 Step two: Cram as much raw chicken into the jar that you can. (it will cook completely in the pressure cooker) Fill it up to 1/2 to 1 inch from the top.  (this jar we didn't fill as full as we could have.) I can usually fit about 1 1/2 breasts into a pint. You don't need to cut it up, but you can.  I usually cut up just what I need to, to fill in the gaps. Don't add any liquid.  The chicken will cook down and release it's own juices.  After you fill the jar. Be sure to wipe the rim with a damp paper towel. Then out on your flat lids and rings.  Just tighten it to the point where it starts to have some resistance.  It doesn't need to be as tight as possible.

Step three: stack your jars inside the pressure cooker.  You need to fill it at least half full. If you have a number pressure gage, you need it to be at 11 lbs of pressure.  If you have the rings pressure gage, it needs to be at the 2nd ring.  Once you get it to the right pressure, start the timer.  75 minutes for Pints and 90 minutes for Quarts.  If you have pints and quarts in the pressure cooker at one time, you will need to do the full 90 minutes. Always remember, when mixing sizes... do the greater sizes time. Also, you will need to keep it at that pressure, so you will usually have to play with the heat a little to keep it on target.
When the timer is up, turn off the stove and let the pressure cooker sit until it is down to zero lbs of pressure.  Then you can remove the pressure cooker lid. With canning tongs, remove jars carefully and place them on a towel on a flat surface.  Allow them to sit until cooled.  Check to see if the jars have sealed by pressing on the middle of the flat lid. If the button is down, it is sealed and can be stored on the shelf for up to 5 years.  If it's not sealed, immediately more to the refrigerator and use asap.

I like to say that chicken looks some what like a science project in a jar. Don't worry, it tastes better than it looks!