Tuesday, May 31, 2011

Delicious Baked Beans

I have to admit, making homemade baked beans has always intimidated me. There are a few things that I have always avoided making, because of intimidation. And because they are just so much easier to pull from the box or the can. Because of this blog, I've jumped to higher heights. Thanks everyone for the motivation!!!  Brownies, cakes, tortillas, tamales and baked beans are on my list.  Tortillas are the only things I haven't checked off the list so far.   The funny thing is, these hurdles are so much easier than what I thought they would be, but for some reason, they just seemed so out of my league.  Do you have some like that?  Seriously, what a rush, to tackle a recipe that you have been avoiding because you were too intimidated.

So yesterday I was browsing around, wanting to give it a try. I was looking for a from scratch recipe (almost all recipes I had seen added canned baked beans... It doesn't make sense to me! Why not just eat it straight from the can then.) I found a few recipes to get an idea of what I needed in it, and then decided to just create my own recipe.  I figured, hey, face the fear and try something new. 

I am not going to lie... I am so proud of myself.  To me, tweaking someone else's recipe to be my own, is easy.  Even creating my own recipes on every day meals, is pretty easy for me now. (It hasn't always been.  Actually following others' food blogs and seeing what they do, has really helped me to be more confident in the kitchen.  I am realizing that a recipe, is just a guide, not a "must do") For this though, it was a huge accomplishment for me.  I've never seen anyone make baked beans from scratch, and only know of two people in my entire life that have. It was a huge shot in the dark, but it turned out fabulously!!!

Ok I'm off the bragging train now :) I made these more of a southwest style. But play around and change things to your tastes.  My husband who doesn't like bell peppers, LOVED these beans.  There is no greater feeling than to create something and then to have your family chow down on it because they like it so much!!  I wanted the beans to be done, that day, so I opted out on soaking them etc.  So not 100% from scratch, I used canned beans, but not canned baked beans :)

Delicious Baked Beans

1lb bacon crumbled
1 medium onion minced
1 green bell pepper minced
1-2 cloves garlic
2 cans northern beans
1 can red beans
1 can black beans
1 1/2 cup brown sugar
1/3 cup molasses
3/4 cup ketchup
1 ½ tsp salt
½ tsp pepper
1 ½ tsp dry mustard


First: chop your onion and bell pepper. (I liked mine chopped pretty small)

Chop bacon into pieces.  You can do this after it is cooked, but I like it better this way.

Toss the bacon in a skillet and fry until done. (I liked mine crispy)  When done, take bacon out of the pan and set aside. What ever you do... save the bacon grease.  Tons of flavor it this stuff!!!

Fry the onions, garlic and bell peppers in the bacon grease until tender.  (It's ok to even fry it all with the bacon too)

Combine all ingredients into a slow cooker and cook on low for 8 hours.  

Monday, May 30, 2011

Carrot Chowder

Carrot Stew, Carrot Stew It's our favorite thing to do...   I used to sing that song in elementary school, and every time I make it to this day.  My mom made this soup for us all growing up.  Its so yummy!  if you want to can this, combine all ingredients raw, and using half the water into a large bowl. Then pour into quart jars and process in a water bath for 90 min! Instant meal in the future! Also, I like to make a double batch and freeze half of it.

The picture didn't turn out too well. I'll take another one when I make it again.  I should be getting my new camera this week. Yippee!!!  Lets hope that it takes some beauties for ya'll.

Carrot Chowder


1 lb. Hamburger
½ C. diced celery
½ C. diced green pepper
1 med onion, diced
1 C. Water
½ tsp. salt
4 C. tomato juice
2 small cans cream of celery soup
1 ½ c. water
2 ½ c. shredded carrots
1/8 tsp marjoram
½ tsp garlic powder
½ tsp pepper
¼ tsp. salt
1 tsp sugar

In a large stock pot, combine first 6 ingredients. Saute' until tender. Add remaining ingredients. Simmer for ½ hour.

Saturday, May 28, 2011

Parmesan Squash with Garlic Butter

Here's another way to use up some of that zucchini and yellow squash that you've have growing in your garden.  This time I actually used frozen, because I was trying to clean out the freezer.  Of course fresh always tastes better, but if you don't have fresh, frozen is a great alternative.

Parmesan Squash with Garlic Butter

3-4 Cups sliced zucchini and/or yellow squash
2 tbsp butter
1 clove garlic
Salt and pepper to taste
2-3 tbsp Grated or shredded Parmesan cheese

Heat pan on medium heat. Place butter and garlic in a pan. Saute' garlic for 1 minute, until golden brown. Add squash and season with salt and pepper.  Saute' until tender. about 7-8 minutes.  Pour onto a serving plate and add Parmesan cheese. Serve immediately.

Friday, May 27, 2011

Easy Chipotle Meatballs

This is one of the easiest dishes ever to make! It only requires 2 items. It's makes a great meal, served over rice or just as an appetizer.  The flavor of the Chipotle sauce are simply delish.  It's a little zippy but even my 15 month old practically inhaled it. I like this Roasted Raspberry Chipotle sauce.  You can find it at at Costco or Sam's Club. 

We loved these served over Coconut Rice. The Coconut and Raspberry make a great combo!  I like to get the Meatballs pre made from Costco. You can make your own basic meatballs or find any premade Italian style or regular flavor.  I don't really use an exact recipe for this meal.  I just coat the meatballs with the sauce, but this is about how much I like to use. 

Easy Chipotle Meatballs

25-30 frozen Meatballs
1 1/2 Cups of Chipotle Sauce

Place both ingredients into a crock pot.  Cook on low for up to 8 hours.

Coconut Rice

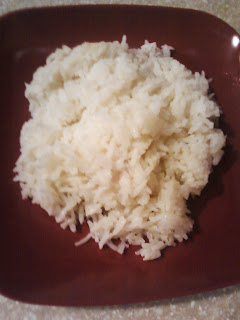
We love just about every type of rice possible in my little family!  This one, I found here, and then added my own little tweaks to it. We have used this rice recipe with Hawaiian Haystacks and many other meals. It adds a nice sweet, delicious flavor to any meal.  We also like to double the batch and eat it as a cereal/or light sweet snack. (see recipe below) 

The thing to remember about this rice is that you need to get the Jasmine Scented Rice.  I've tried it with white rice and it just doesn't work for this recipe. Brown rice doesn't work either.  The Jasmine really compliments and brings out the coconut flavor.  I like the Golden Star brand personally. You can find it at Wal-Mart. Also, I love using my rice cooker.  It's done perfectly every time! I used to think they were pointless because I always did it on the stove... but it really does save so much time and energy. You just throw it in and let the rice cooker do the rest.  You can find them pretty cheap. If you like rice... check em out.  They make life so much easier!  :)  However, you can just cook this over the stove. Just bring the rice to a boil and then simmer on low until all of the moisture is gone.  (about 20 min)

Coconut Rice


2 cups Thai jasmine-scented white rice
1 can good-quality coconut milk (not “lite”) (About 1 1/2 cups)
2 cups water
1/2 tsp. salt
1 tbsp brown sugar

Place rice in rice cooker. Add the water, coconut milk, sugar and salt. Stir well (use a plastic or wooden utensil to avoid scraping off the non-stick surface).Cover and set to cook.Once your rice cooker switches to “warm” mode, allow another 8-10 minutes for rice to finish “steaming”. This will ensure your coconut rice is fully cooked and pleasantly sticky. Gently fluff with chopsticks before serving.  Serves 4


Rice and Milk

1 cup Coconut rice (can use regular white rice too, but this is even better!)
1-2 tbsp sugar
milk (desired amount)

Pour ingredients in a bowl and enjoy! 

Tip:  I like the rice to be warm and then add the cold milk. The hot and cold twist, make a good combo.

Wednesday, May 25, 2011

Chile Lime Chicken Tostadas in a Slow Cooker

This recipe is a huge hit in our home.  Every time I make it, the kids just gobble it up.  I found the recipe over at Real Mom Kitchen one day when I was needing some new "go to" recipes to try. I love that you can just throw it in the crock pot in the morning and it's done by dinner.  And it makes my house smell good all day too! There's nothing like a fabulous meal and a little bit of work right?  You can also can this really easy for a quick meal in the future. See below for details on how to can it. I also like to double this recipe and freeze half of the chicken. That way I have some later for a last minute meal. 

You could use this as a taco filling, on quesadillas or even as an enchilada filling like my Sour Cream Enchiladas.  Just use this recipe (below) to flavor the chicken and leave out the extra can of green chiles in the enchiladas recipe.  Super yummy!


Chile Lime Chicken Tostadas

1 can diced green chilies
4 cloves of minced garlic
1 1/2 Tbsp. chili powder
3 Tbsp. lime juice
1 diced medium onion
2 lbs. boneless chicken breasts
1 can refried beans, warmed
10 tostada shells
Desired toppings such as: shredded lettuce, shredded cheese, salsa, sour cream, sliced olives, guacamole

Add chicken and onion to a slow cooker that is at least 3 1/2 quarts. In a bowl combine green chilies, garlic, chili powder, and lime juice.  Pour over chicken. Cover and cook on low for 5 to 6 hours.
Remove chicken from slow cooker and shred.  Mix in 1/2 cup of juice remaining in slow cooker to the shredded chicken. Spread warmed refried beans on tostada shells. Top with hot chicken mixture and any other desired toppings.

Chile Lime Chicken (how to can it)

Cube raw chicken and pour into a large bowl. Add in, green chiles, garlic, chile powder, lime juice and diced onion.  Mix well.  Using a canning funnel if possible, pour chicken into the jars filling them with 1/2 inch of head space. Wipe rim of jar with a damp paper towel. Secure on the lid.  Process in a pressure cooker for 75 minutes for pints and 90 minutes for quarts.  Remember!!!  You can mix pints and quarts in your pressure cooker. You will just have to process it for the full 90 minutes.  Always Always Always use the greater amount of time when mixing sizes of jars, or when in doubt.  It won't hurt the chicken to be in there a little longer.

Tip You can usually get about 1 lb of meat into a pint jar.  So this recipe will only give you 2-3 pints. (I like doing this one in quarts for my size family) If you want a good supply I would make the recipe x5 or 6.


Tuesday, May 24, 2011

Black Angus' Baked Potato Soup

This has got to be the best potato soup that I have ever tasted!  I got the recipe from a friend of mine. I'm not sure if it's a copy cat or their actual recipe, but either way it's delightful! I know it's getting a little warm for soups right now, but I love my soups even in the dead of summer, so I wanted to post it. 

Black Angus' Baked Potato Soup


4 Lg. Baked potatoes
2/3 C. Butter
2/3 C. Flour
6 C. Milk
4 green onions (diced)
12 slices bacon, cooked crisply and chopped
¼ tsp. pepper
½ tsp. salt
1 ½ C cheddar cheese, shredded
8 oz sour cream

Bake Potatoes. Remove skins and discard. Put rest of potato in mixing bowl . Set aside. In a large pot, melt butter; then add flour. Whisk to paste. Cook for one minute. Add Milk. Stir constantly until thick and bubbly. Remove from heat. Add potatoes, salt, pepper, bacon and green onion. Stir until combined. Add cheese and stir until melted. Add sour cream. Serve in soup bowls or bread bowls. Top with extra cheese, onion, bacon, and/or sour cream.

Tip: if you need to, smash the potatoes up witha a wisk or a potato masher either in the bowl or in the pot.

And the Giveaway Winner Is...

Congratulations to Brianne R. for winning this giveaway! You just won $20 of free products to Baby B Boutique

Everyone check out the site, she has amazing products, amazing shipping (free!!!) and amazing service! Her talent is amazing.  We will be posting Brianne's recipe in an upcoming post! Congratulations!!!

Monday, May 23, 2011

Kabobs on the Grill

We experimented with a few flavors while grilling this week.  We had a night of Kabobs and made them a few different ways.  My favorite was the chili lime kabobs.  My husband didn't measure as he went, so this recipe is just an estimate.  Have fun with it and see what you can come up with.  I also really like the teriyaki ones.   The olive oil ones weren't my favorite, but I think I just under salted it. It needs more salt than you think for all of those veggies and meats.

We also found that by putting them on the bottom rack, even on low heat, the veggies were done and burning before the meat was done. So, we put them on the top rack this time and had much better success.  We hooked the skewers into the back of the top rack and laid them side by side, so that we could fit more of them on there. It worked out perfectly!

Kabobs on the Grill


Use any type of meat you desire- shrimp, chicken, or beef etc.
Vegetables- peppers, onions, zucchini, yellow squash, etc
Fruits- pineapple, tomatoes etc

For all kabobs: Cube meat, vegetables and fruit. Coat them with desired seasonings.(see below)  Skewer them one by one, in desired order.  Grill on top rack at medium low heat until cooked through.  (cooking times will vary depending on size and types of meat and vegetables.)

Tip:  If using wooden skewers, soak them in cold water for 30 min. so they don't burn.  

Chili Lime Kabobs

1 Tbsp lime juice
1/8 cup water
About a tsp of Salt
1/2 Anaheim pepper chopped fine

Toss meat and veggies with sauce (makes about 3 kabobs)

Teriyaki Kabobs

Terryaki Baste and glaze

Coat meat and veggies with desired amount of Teriyaki Baste and Glaze (I like Kikkomans).

Olive Oil Kabobs

Olive oil
salt  
pepper

Coat meat and vegetables with olive oil, salt and pepper.  (don't skimp on the salt)


Saturday, May 21, 2011

Queso Dip

Here is a really easy Queso dip for you.  I first tried it at a Halloween potluck cook off for our ward last year. It's so delicious, I thought there were tons of ingredients involved.  Nope only 2.  I overheard them telling the recipe to a friend and decided its about time I pass it along. 

  Queso Dip

1 reg sized box of Velveeta cheese (I just used the Walmart brand)
1 can Rotel
milk (optional)

Put ingredients in a crock pot and let it sit on low for about 4 hours.  If the cheese is too thick, you can add milk if needed to thin it out. Serve with chips.

Thursday, May 19, 2011

Sweet Grilled Peaches

Our Peach tree has been producing hundreds of peaches this week!  We decided to do some grilling for dinner because it was such a beautiful day. I found this recipe for Sweet Grilled Peaches. They used frozen peaches, but I used fresh. My peaches are cling stone peaches, which means they don't pull away from the pit very easy.  So I threw the whole peach on the grill, but you can cut them in half and pit them if you want.  I was amazed that after it was grilled, it practically fell off the pit. 

These were so yummy.  I should have doubled the recipe! I felt like I was eating a fresh peach pie. They were so easy to do also. I'm sure that if you don't have a grill, you could bake them in the oven for a few minutes.

Sweet Grilled Peaches

Honey ( about 1/2 cup)
ground cinnamon (about 2 tbsp)
10 peaches (cut in half or left whole)
Aluminum foil

Peel peaches. Cut in half and pull out the pit if desired.  Lay peaches on a large sheet of foil.  Drizzle peaches with honey and sprinkle with cinnamon. Fold up foil, sealing all holes, so juices don't drip out. Place on grill at medium heat. Grill for 10 minutes.  Remove from grill and open package carefully. 

This is a picture of it right before I sealed it up

Here is how I sealed it. Just fold the edges in and fold over the top a couple times.

Wednesday, May 18, 2011

Malibu Chicken and a Giveaway!

Here is another of my Mother-in-law's specialties. She is here visiting this week and we are really enjoying her company. She created this recipe for her kids when they were going to dances in High School. She  hosted the dinner and made this dish. 

The combination of the different flavors really compliments each other. I especially love the pineapple on top! That is my favorite part.  I have used chunk pineapple and just poured it all over the chicken. That works too.  When using the rings, it does help to separate the portions better.

It's my birthday this week!  To celebrate, we are doing another giveaway! For this one, you will receive $20 of your choice to the Baby B Boutique. She has some amazing items for your little ones.  If you don't have little ones of your own, they will make great baby shower gifts or Grand baby gifts.

Here is a little info about the creator of Baby B Boutique.  She is a busy mom of 2. Her son, known as "little man" is her inspiration for her ties- "I was tired of him ripping off the store bought ties that came with his church suits." Her daughter, "Miss Ellie" is her inspiration for all things girl. She creates her products during nap time and bed time! She likes to make things for her kids and for her home. You can check out her craft blog: here. Some of her favorite projects found on her blog are the bib shirt and matching hairband she made for her daughter and her jewelry organizer. Check it out!  She is amazing!

Here's what you have to do to enter the giveaway...post a response telling me your favorite thing to make with your kids in the kitchen.  To add a second entry into the giveaway, email me your favorite recipe using 6 ingredients or less. (If you can please send a picture of you making it. Or a picture of the finished product.) You can email me at mommyskitchencreations@gmail.com. We will feature the winners recipe on here next week.

Your chance to enter the giveaway will end on Monday the 23rd of May. I will announce the winner on Tuesday.  Good luck!

Malibu Chicken

6 chicken breasts
6 slices of ham
6 slices provolone cheese
6 pineapple rings
1 jar of Teriyaki baste and glaze (I use Kikkoman)

Lay chicken breasts in an oven safe pan. Bake at 350 degrees for about 45 minutes or until cooked through.  Remove from oven (drain excess juices if desired) and layer the chicken with ham, cheese, and pineapple (you can secure it to the breast with a toothpick)Then drizzle with sauce.  Turn oven to a high broil.  Bake for about 5 minutes until cheese gets bubbly and golden. Serve immediately.


Grill it up!

We have really enjoyed grilling this recipe.  We like to slice the breasts in half (unless it's a really thin one).  Then with a kitchen mallet/tenderizer, pound the chicken down, to tenderize and flatten it a little bit.  Grill it on med high heat.  Since it's so thin, you will only need a few minutes on each side. You can also throw on the pineapple to grill for a few minutes at this time to bring out the flavors. When the chicken is just about done, add on the cheese, then ham, sauce, then grilled pineapple. (to the top)  Grill without flipping sides, just until cheese is melted and sauce starts to caramelize.  Remove from grill and enjoy!

Tuesday, May 17, 2011

Pepperoncini Poppers

There is one word that describes these little guys!   Addictive! My brother brought them to a family dinner and they have been a huge hit ever since.  They are so easy to make, and add a great snack to any party. 

There are two ways to cook these.  Microwave or oven.  The microwave, is faster, but seems to make the cheese run a little more. So it can be a little more messy.   (like in the picture)  But when you are just making a couple to have for a snack, it's a perfect way to do it. 

In the oven, it melts slower and tastes even better. The cheese also seems to stay in a gooey stage for longer. So for big batches, or for parties?  This is the way to go. 

The best turkey to use, is a thick sliced turkey.  Depending on the size of the slice, you can cut it in half to wrap around the popper.  The best mozzarella cheese that I have found to use, is string cheese. I can usually do about 3 poppers per piece of string cheese.  I have used chunk mozzarella cheese and it works just fine. I just like the all around end product with string cheese a little better.  
Pepperoncini Poppers

pepperoncini (whole)
Thick sliced turkey
mozzarella cheese (like string cheese)

Take off the stems and seeds from the pepperoncini, leaving as much of the pepper in tact as possible.  Stuff the pepperoncinni with cheese and wrap with a slice of turkey.  Hold together with a toothpick. Bake at 350 degrees for about 10 minutes or until cheese is softened and melting.  (you can also microwave for about 30 seconds if you prefer) Serve immediately.


Monday, May 16, 2011

Corn and Hot Dogs

Do you remember all of those crazy things that your parents came up with to feed you as a kid?  Most of them had to do with hot dogs right?  Especially when times were rough, they had to get really creative and throw a meal together out of what was on the shelf. This is just such a meal.  And believe it or not, still one of my favorite, throw together meals. It seems like such a weird, gross combo I'm sure. But I sure like it. 

It's kind of like dipping your french fries in your ice cream.  Ever done that?  The combo of sweet and salty really compliment each other.  That's what happens with this dish.

Corn and Hot dogs

2 cans of Creamed Corn
3 hot dogs sliced
salt and pepper

Combine ingredients in a bowl and heat in the microwave for about 2-3 minutes. You can also heat it on the stove.  


Saturday, May 14, 2011

Blackberries and Cream

I love berry season!  I haven't met a berry yet that I don't like.  I've enjoyed making some of our favorite berry treats lately. This is one of my husbands favs.


12 oz blackberries (about 2 cups)
½ cup cream
1 ½ TBSP sugar

Mix ingredients in a bowl.  Serve whole or smashed.

Friday, May 13, 2011

Spaghetti Sauce (Fresh or Canned)

Many people have been asking for some good canning recipes.  This is a spaghetti sauce recipe for fresh herbs.  If you don't have fresh ones, you can substitute for dried ones.   Dried herbs are typically more concentrated and potent, so you wont need as much, if you are substituting.  The ratio is typically 3 times more fresh herbs than dried herbs. I also have a dried herbs recipe called JJ's Spaghetti Sauce.  Either one, you can "can".

There is no spaghetti sauce out there that compares to homemade sauce.  If you are eating it for dinner tonight, canning or freezing some for later or both... the steps are the same up until it's time to pour it into the jars. You will need a HUGE pot.  I used my pressure cooker because I didn't have a pot big enough. 
REMEMBER:  Taste as you go and add spices, salt, etc as needed.  It does need to boil for at least 30 minutes before the flavors really combine so don't add anything extra before that!
Spaghetti Sauce (Fresh or Canned)


25 lbs tomatoes (about 9-10 quarts blended) ( I used Roma's this time)
1  6lb 10 oz can of tomato puree (Costco)
10 large bay leaves
4 medium onions diced
1 ½ tbsp minced garlic
3-4 tbsp olive oil
1 1/4 cup sugar
1-1/2 cups fresh herbs of your choice.  (This is what I used)
½ cup parsley
½ cup basil
4 tbsp oregano
4 sprigs of rosemary
3 tbsp thyme
1 tsp marjoram (ground, not fresh) (optional)
¼ cup salt
2 tbsp pepper
 lots of ice

Prepare Tomatoes:  Cut the stem area out of the tomato. (or just slice the top off to save time)
Slice an "x" about 1/4 inch deep on the bottom of the tomato (this allows the skin to peel really easy when boiled.)

Drop tomatoes a few at a time into boiling water. Boil for 30-60 seconds, until skin softens and starts to peel back.  Remove and immediately place into a bowl of ice water. It melts fast, so keep adding ice as needed.
When cool enough to touch, peel the skins and discard. You can blend the tomatoes to make a smoother sauce or just smash with a potato masher.  Pour tomatoes and herbs into a huge stock pot.

In a skillet, add olive oil, garlic and onions. Saute until tender and then add to the pot.

Boil for about 30 minutes, stirring frequently.  After 30 minutes, taste and add flavors according to desired tastes.  Boil down to desired thickness.

It's ready to serve or if you are canning the sauce, continue

You will need to add 3 tbsp of vinegar per quart jar. Pour sauce into clean jars leaving 1 inch of head space. Wipe rim clean with a damp paper towel. Screw on lids and place into a water bath.  Boil for 40 minutes. Pull out with canning tongs and let cool on a towel on a flat surface.


TIP:  If you are adding vegetables to your sauce, you will need to to pressure cook it at 11 lbs of pressure for 30 min for pints and 35 minutes for quarts.

If you want to put meat in it, you will need to pressure cook it at 11 lbs of pressure for 75 min for pints or 90 for quarts.

What is a water bath? A water bath is basically a huge pot that will cover your jars with about two inches of water.  You can buy a water bath or just use a tall pot. You will need to bring the water to a boil and then start the timer.  The water needs to boil the entire time.

Chicken Pot Pie

If you are looking for an easy meal to run to a friend in need, or to someone who just had a baby... this is it.  When I had my 2nd baby, a friend brought this to me. It was the perfect dinner.  It's just another one of those comfort foods. The flavors are nice and gentle. And just plain delicious! It almost melts in your mouth.  This would be great to serve with corn bread, or even garlic bread. And maybe a nice bowl of fruit.  It's loaded with veggies and some protein so you have most of the meal covered right there.

This make a perfect freezer meal also.  Make up a couple ahead of time without cooking.  Cover them with foil and freeze.  Just thaw and cook, when you are ready to eat it.

If you are vegetarian or don't like chicken, you can easily leave it out and substitute the cream of chicken for cream of mushroom or something similar.  Although If you want the chicken in it... this is a great way to use your Canned Chicken.

Also, if you don't like a certain veggie, then leave it out. You can fill it with anything you like. My favorite, is the squash. Oh boy it's so good in there! You can use fresh or frozen veggies. When they are cheap and I have a little more time, I like the fresh ones better.  It just makes the dish taste so much healthier.  I put everything in there raw when I am using fresh veggies.  The only thing is, the carrots are still a little firm when it's done, so if you like them soft, just steam them for a couple of minutes and then throw them in. I like them still a little firm.

When using frozen ones, I just put them in straight from the freezer, but you can thaw them if you want. I'm all about skipping any unnecessary steps! One step that I keep, is laying the veggies down separately and then adding the sauce. I like to make sure that each bite has a little of everything. When it's heated, the sauce melts down and coats everything nicely. You can however, just mix it all together and throw it in. That works too.

One more thing... The pie crust, you can get in a box in the refrigerator section near the biscuits. It already comes with a top and a bottom crust. You just need to make sure to have a pie plate.

Chicken Pot Pie

Sauce:
1 small can cream of chicken
1 cup sour cream
½ tsp salt
¼ tsp onion powder (or you could use diced onion)
Dash of garlic salt
Dash of pepper
1/2-1 cup shredded or diced cooked chicken
Vegetables ( fresh or frozen) about 3-4 cups (broccoli, cauliflower, green beans, peas, corn, zucchini, yellow squash, carrots etc)
Refrigerated pie crust (a top and a bottom)

Mix your sauce in a bowl and set aside. Lay uncooked pie crust in a 9 inch pie pan. Place vegetables and chicken in next, making sure that each one is distributed evenly. See Pict below.  Fill to the top with vegetables. 

Next, pour the sauce over the veggies, and top with remaining pie crust. Cut off excess crust and crimp the edges.  Cut a "t" in the center and fold back the sections.  See pict below. This allows the inside to cook and release the excess moisture. It makes it look pretty too.


Bake at 350 degrees for about 30-35 minutes, until crust is golden brown. Slice and serve.
 

Wednesday, May 11, 2011

Squash Casserole

The first time I tried this, My sister-in-law made it for me. We were up spending time with her and my brother just after they got married.  I remember thinking, boy my brother is lucky, this girl can really cook! (of course that's not her only strong point. She is amazing all around) It was so good! This is one of those comfort foods that really makes your mouth water just thinking about it.  My sweet mother made it for me again this week, when I was sick.  Thanks mom!

It's also a great way to use up that summer squash.  I'll have to come up with some serious zucchini/squash recipes for ya. We will be having tons of it come off real soon. 

I apologize for the picture.  I'll be getting a real camera this weekend!!!

Squash Casserole

6 yellow or zucchini squash (I do 3 of each)
1/3 c. margarine
1/2 c. sour cream
1 med. onion chopped
1 can cream of chicken soup
1 pkg. seasoned dressing (large bread crumbs)

Slice squash and chop onion; steam until tender. Mix in soup and sour cream. Pour melted butter over dressing and mix.  Put ½ of dressing in bottom of a 9x13 inch baking dish. Pour in mixture and top with rest of dressing. Bake at 350 for 20-25 minutes.

Tip:  This makes a great freezer meal.  Double the batch and save some for later!

Tuesday, May 10, 2011

Penne Rigate with a Garlic Butter Sauce

I love when my husband gets creative in the kitchen! This recipe was a last minute, throw it together meal. It is so easy and so delish!  You may want to double the sauce recipe if you like your pasta to have more flavor
Penne Rigate with a Garlic Butter Sauce
3-4 cloves crushed garlic
1 cup butter
crushed black pepper to taste
salt to taste
1 box Penne Rigate Pasta

Boil  pasta and set aside. On medium low heat, melt butter and put in garlic.  Saute for about 5 minutes until garlic is golden brown.. Add salt and pepper. Stir and pour over cooked pasta.

Tip: To add a little different flavor, try adding a splash of lemon juice or top with Parmesan cheese

Monday, May 9, 2011

Simple Cheese Ball

A dear friend of mine used to make this cheese ball.  It tastes like you spent hours making it, when really it takes 5 minutes. The hardest part is chopping the nuts to put around it.  It has a total of 4 ingredients and that's it.  Every time I make it, I get tons of compliments.  Enjoy!

Simple Cheese Ball

1 packet ranch seasoning
2 cups shredded cheddar cheese
1 8 oz pkg cream cheese
1/2 cup chopped pecans

Mix first 3 ingredients together with an electric mixer. Roll into a ball and then roll into chopped pecans. Serve with crackers.

Saturday, May 7, 2011

Happy Mother's day Treats!

Happy Mother's day to all of you amazing woman out there!  Even if you don't have children of your own... Every woman is a mother in one way or another. You all are worthy of celebration! Thank you for making this world a better place. A special Happy Mother's Day to my dear Mother. She is an amazing woman, mother and grandmother. She will have 5 new grandchildren join her life this year. She taught me to love being a mother! She taught me compassion, gratitude, love, endurance, and patience. She also gave me my love for the kitchen. I sure love you mom!!!

Today's post is a special one, just for Mother's Day. My sister had her baby shower a little while back and I thought I would share some cute pictures from it.  Here is the really cool part... The cup cakes you see, were made by an 11 year old. I told her that I would post them and get her some business.  She also made an amazing bridal shower cake for my sister when she got married.  This girl is talented!!! If you want her info, let me know.

Did you know that Huggies makes jean looking diapers?   Pockets and everything. They are so cute! Since my sister is having a boy, we decided to use the blue diapers for the cake. It turned out so adorable!!!

At my mother-in-laws request... here is the recipe for the diaper cake. You will need about 100-130 diapers. (depending on the size you want and the size of the diaper) Start at the open end of the diaper and roll towards the folded edge.  Tie with thin ribbon or embroidery floss.  You could even use raffia or anything else you have.  Get creative!

With someones help (It's tough to try this on your own... but I've done it) stack the diapers in a circle, starting in the center and adding them evenly until you get to the size you want for the bottom layer. Wrap a wide piece of ribbon around the edge and tie into a double knot. You can make a bow, add toys, or other baby items to cover the knot or just leave it the way it is. When it is tied off, I like to add 5-10 more diapers into any loose spots so that the diapers fit a little more snug inside the ribbon. This way, when you are transferring it, they won't pop out. 

Continue doing each layer the same way, adding less and less diapers. I don't connect the layers. It's easier to transfer this way. Then when you get to your destination, you can just stack the layers there. Top with your favorite baby item, or bow. This is such a creative shower gift for the "mommy to be".  This method also makes it so that the mom can use the diapers for the baby. (instead of using glue and wasting perfectly good diapers.)

How cute are these? I still can't believe that an 11 year old made them.  Her mom said that she didn't help either.  This girl is amazing! Again if you want her information, let me know. She doesn't just do cupcakes either.  She has made some beautiful cakes.


A Watermelon cradle! What a great way to decorate a watermelon. My mother has done this kind of a thing for as long as I can remember. Stay tuned for more designs and how to's in the future. 

Brazilian Limeade

My husband lived in Brazil for a couple of years and really loved this drink while he was there.  We also have many Brazilian friends and got this recipe from one of them.  There is just something about this drink that hits the "comfort food" button. It's so creamy and delicious. Our Favorite part is to drink the frothy foam at the top. You can also add ice (I like using sonic ice because it shaves up nicely) to the blender to may it more of a slushy drink.

Brazilian Limeade

2 limes
1/2 cup sugar
3 tbsp sweetened condensed milk
3 cups water
ice

Wash limes and cut into quarters (Keep the peels on). In a blender, combine limes, sugar, condensed milk and water. Blend for about 30 seconds, or until limes are broken down. (you can also add ice to this step to make it a thicker drink) Strain juice through a fine mesh strainer to remove pulp. Serve over ice.

Friday, May 6, 2011

Freezer Jam

This recipe goes right along with yesterdays post Basic White Bread. I love me a little bread with homemade freezer jam. You can also "can" jam.  I'll show that one in a later post.  I like canned jam, but freezer jam tastes so much more fresh and delish. Its also a lot easier to do. I also like a hot piece of toast or a hot roll with jam from the freezer. It's still not quite solid when it's frozen. So you thaw it just enough to be able to scoop out... and then the ice cold jam, on a hot piece of bread is fabulous!

I like to use the liquid pectin, just because you can skip a step that way, but really any pectin will do. Each package will come with its own instructions, so be sure to follow them. (If you are using liquid pectin, the recipe will be pretty similar if not exact to this one.) I'll just post the recipe that I used. Here is a picture of the box.

You can also use all different types of berries, and other fruits to make jam.  Some need to be cooked and some can be made into no cook freezer jam. Just follow the instructions on the package and you will be just fine. For now, here is the basic strawberry freezer jam recipe.


Freezer Jam

2 cups crushed strawberries (about 2 1lb containers)
4 Cups sugar
2 tbsp lemon juice
1 package of liquid fruit pectin (I used Ball brand this time)

crush strawberries with a potato masher. Combine fruit with sugar in a large bowl. Mix thoroughly and let stand 10 minutes. Add entire pouch of liquid fruit pectin and lemon juice. Stir for 3 minutes. Ladle freezer jam into freezer safe containers, leaving 1/2 inch of headspace. Apply lid and let stand in fridge for up to 24 hours. When jam is "set" move to the freezer for up to 1 year. Or you may keep it in the fridge for up to 3 weeks.

Thursday, May 5, 2011

Basic White Bread

Don't you just love the smell of you house as bread is baking.  Can we say Heaven!! If you have never made bread before... Try it. It's awesome. Don't get intimidated. Just try it. You don't need any fancy equipment or even a bread maker. If you have a nice heavy duty mixer, that is ideal. (egg beaters wont work too far into the process) Otherwise after the first couple of cups of flour, you will need to start mixing by hand.  I've made this recipe hundreds of times and used my hands quite a bit. Don't be afraid to play with it and get your hands dirty.  It's fun!

This is a simple white bread recipe.  You don't have to use any special flour, just plain white four will do.  I had some extra bread flour this time so I decided to try it.  It made it taste even more light and fluffy.  It also made it rise, like I have never seen before.  So if you have bread flour, go for it, and just fill your pans about 1/4 of the way instead of 1/2. Otherwise, plain ol' white flour works beautifully. Also its not necessary, but it makes a HUGE difference.  You will want to use SAF yeast.  Nothing works better than SAF.  You can find it at food storage stores and specialty bakeware/cookware stores. This recipe come from a friend of mine.  She gave it to us to use in our church cookbook. 


Basic White Bread

4 tbsp, saf instant yeast. 
5 C Water
1 C Canola oil
4 eggs
1 C sugar
2/3 c Powdered dry milk
2 tsp salt
14 c. flour approx (bread flour works best but all-purpose is still great)

Mix 5 cups flour, salt, sugar, milk and yeast.  Add Water, oil and eggs.  Mix thoroughly and add flour just until it pulls away from the sides.(of mixer)
Let rise until doubled, punch dough. About like this :)

For bread... put into greased bread pans. Let rise until its the size of a nice big loaf of bread. For rolls, roll into balls and place in a baking pan about a half inch to and inch apart. Let rise until doubled. Bake about 30 minutes. (Less time for the rolls.When they start to get golden brown... they are done.)\

Tip: the key to light and fluffy bread, is using as little flour as needed.  When the dough starts to pull from the sides of the mixer, or becomes just easy enough to handle with your hands, it's ready. It's better to flour or oil your hands to shape it, rather than have it easy enough to handle with out doing that. 

Wednesday, May 4, 2011

Microwave Enchiladas

Here is a 5 minute meal for those busy nights when you don't feel like cooking. This is such a super easy and quick meal. I got this idea from a friend of mine. It's a big hit at my house. All you need is a good red enchilada sauce. I like using Macayo's brand. It's not to spicy and not too runny. 

Microwave Enchiladas

12-15 Corn Tortillas
large can of red enchilada Sauce
Shredded cheddar cheese

Pour enchilada sauce into a skillet on low heat. When sauce is warm, coat tortillas one by one with sauce. (they don't need to sit in the sauce more than a second on each side. If you put them in there too long, the tortilla will fall apart.)

Lay coated tortilla on a microwavable plate and place desired amount of cheese onto half of the tortilla. Fold in half and microwave for about 30 seconds or until cheese is melted. Add shredded lettuce, sour cream etc to your enchilada after microwaving.

Tuesday, May 3, 2011

Bacon Wrapped Grilled Corn on the Cob

Oh boy oh boy, this recipe puts a whole new twist to corn on the cob. Bacon seems to make anything better.  And there is nothing more satisfying to me than a nice ear of corn on the cob.  What a great combo! We have been grilling a bunch lately. I went to the library and got a video about grilling from Paula Deen. There was some fabulous recipes on there. I am so excited to try them!  I just love Paula Deen.  That woman knows how to make some serious comfort food. I also have another one of hers called Tastes Like Lasagna Soup on here, that is just heavenly. 

Bacon Wrapped Grilled Corn on the Cob

8 ears of corn
1 lb bacon


Gently pull back the husk exposing the corn. Do not remove the husk. Remove the corn silk and use a brush to make sure all the silk is removed. Soak the corn with the silks removed in water for 30 minutes. This will prevent the husks from charring.


Preheat a grill to medium heat.


Remove from the water and pat dry. Take a strip of bacon and wrap it around the corn. Fold the corn leaves back over, covering the bacon and corn. Tie the leaves with butcher string and repeat the process for each ear of corn. Place the ears of corn on the hot grill and cook, turning occasionally until bacon is cooked and corn is tender, approximately 15 to 20 minutes.